

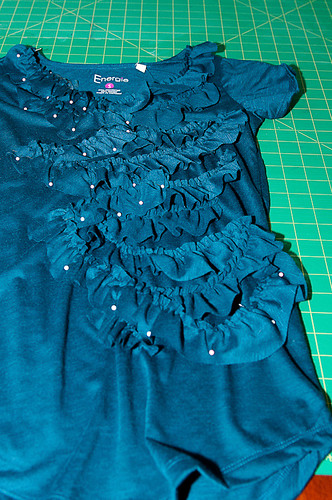
The finished product.
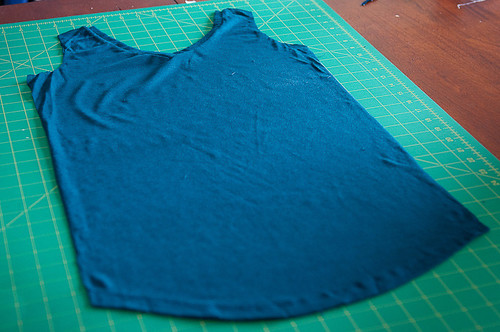
Cut the down the sides and remove the sleeves from one shirt.
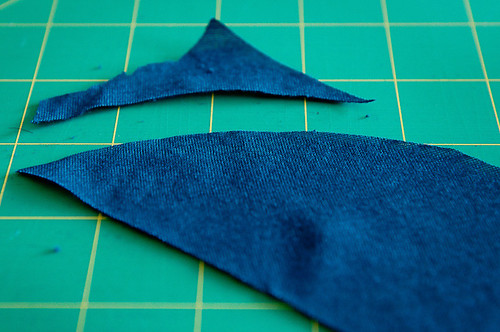
You should end up with two pieces that look something like this.
You should end up with two pieces that look something like this.
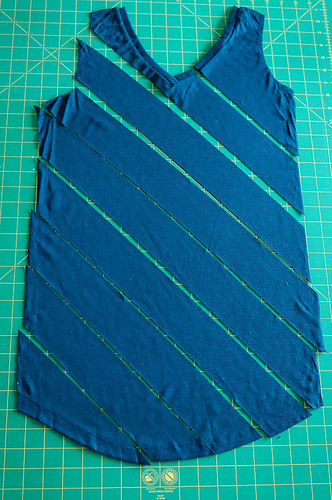
Cut on the diagonal to make long strips 2.5" wide, do this on both pieces.
Round the edges of each strip.
Cut each strip with a wavy edge on one side. (I didn't get a picture of this step,
but you can see it here on the tutorial I followed.)
Cut each strip with a wavy edge on one side. (I didn't get a picture of this step,
but you can see it here on the tutorial I followed.)

Run a straight stitch using a wide stitch down the straight edge of each strip.
Pull one thread to ruffle the strip.
Pull one thread to ruffle the strip.

Ruffle all remaining strips.

Using one of the smaller strips, pin and sew it on the collar's left side.
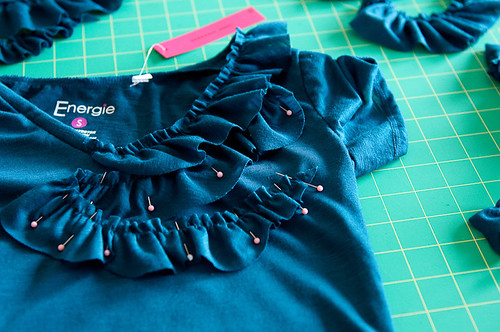
Continue pinning and sewing strips, folding and overlapping them.
Once you near the bottom of the left side, repeat starting from the right side of the collar.
I kept most of my strips toward the left side, overlapping my first set of ruffles.
I kept most of my strips toward the left side, overlapping my first set of ruffles.
The finished product. :)
12 comments:
that is awesome!!! You rocked it out! I sooo want to try this now! Thanks for sharing with us. :)
I really love it, especially the color. Way to go! I haven't seemed to be able to master my sewing machine or I would try this too. I love the ruffles. Having two girls has encouraged me to embrace girlie things.
Wow Noel this is AWESOME! The first one you did pointed me to that great site and I have made some super fun plans to make my pregnancy very stylish this summer. Thank you for sharing!
Again, super cute. I love that we can be crafty in so many different ways. ROCK ON!
Seriously adorable.
This is sooo cute! I'm going to have to make one!
LOvely, perfect! And it seems easy too! :)
I might try!
Cecilia
I found you on Pinterest and used this tutorial on my own shirt! Come see!
http://jamesandleighann.blogspot.com/2011/11/dip-dyed-ruffle-shirt.html
This is incredible! I so want to attempt this but am nervous! Your tutorial seems so easy to follow though. The shirt is beautiful!!
Great tutorial & love the ease of creating cuteness. Question though... Do you just sew over the loose ruffles when you overlap? Also I am assuming you've followed the first stitch you used to make the ruffles and then just left both stitches instead of pulling the first, as you normally would, right?
I just saw this now from Pinterest. Very cute idea! Do you sew with a normal sewing machine? Is it a stretchy seam, like zig-zag or how do you do that? Thanks!!
Very awesome idea. Perfect for covering up a stain or pilling on and otherwise good shirt.
Post a Comment